1. Simple Jupyter Notebooks
Using A Simple Jupyter Notebook
Jupyter Notebooks extends the console-based approach to interactive computing in a qualitatively new direction, providing a web-based application suitable for capturing the whole computation process: developing, documenting, and executing code, as well as communicating the results.
To use a simple Jupyter Notebook, first begin by logging into the engaging OOD portal found here.
For instructions on how to log into the OOD portal, please see here.
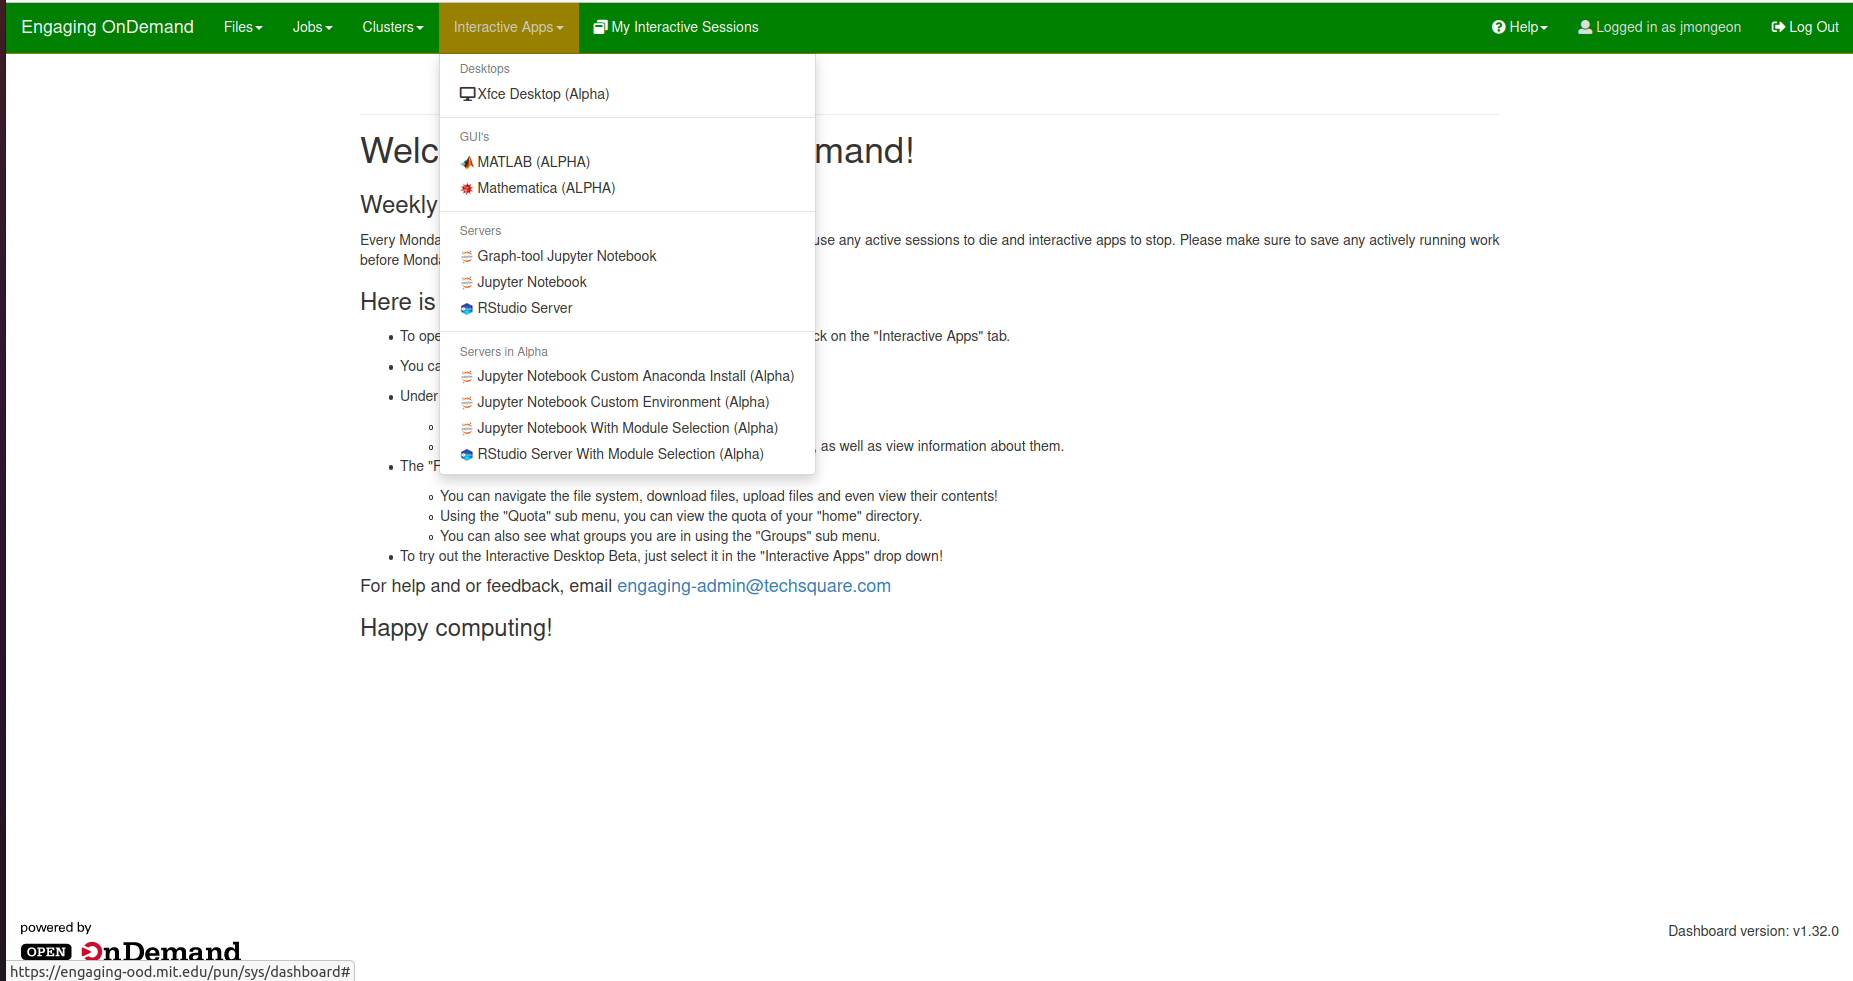
Once you’ve logged in, you will need to select ‘interactive apps’ at the top of the screen, which will present a list of possible interactive applications available for use. For a simple Jupyter Notebook, you will need to select “Jupyter Notebook” under the header “Servers”

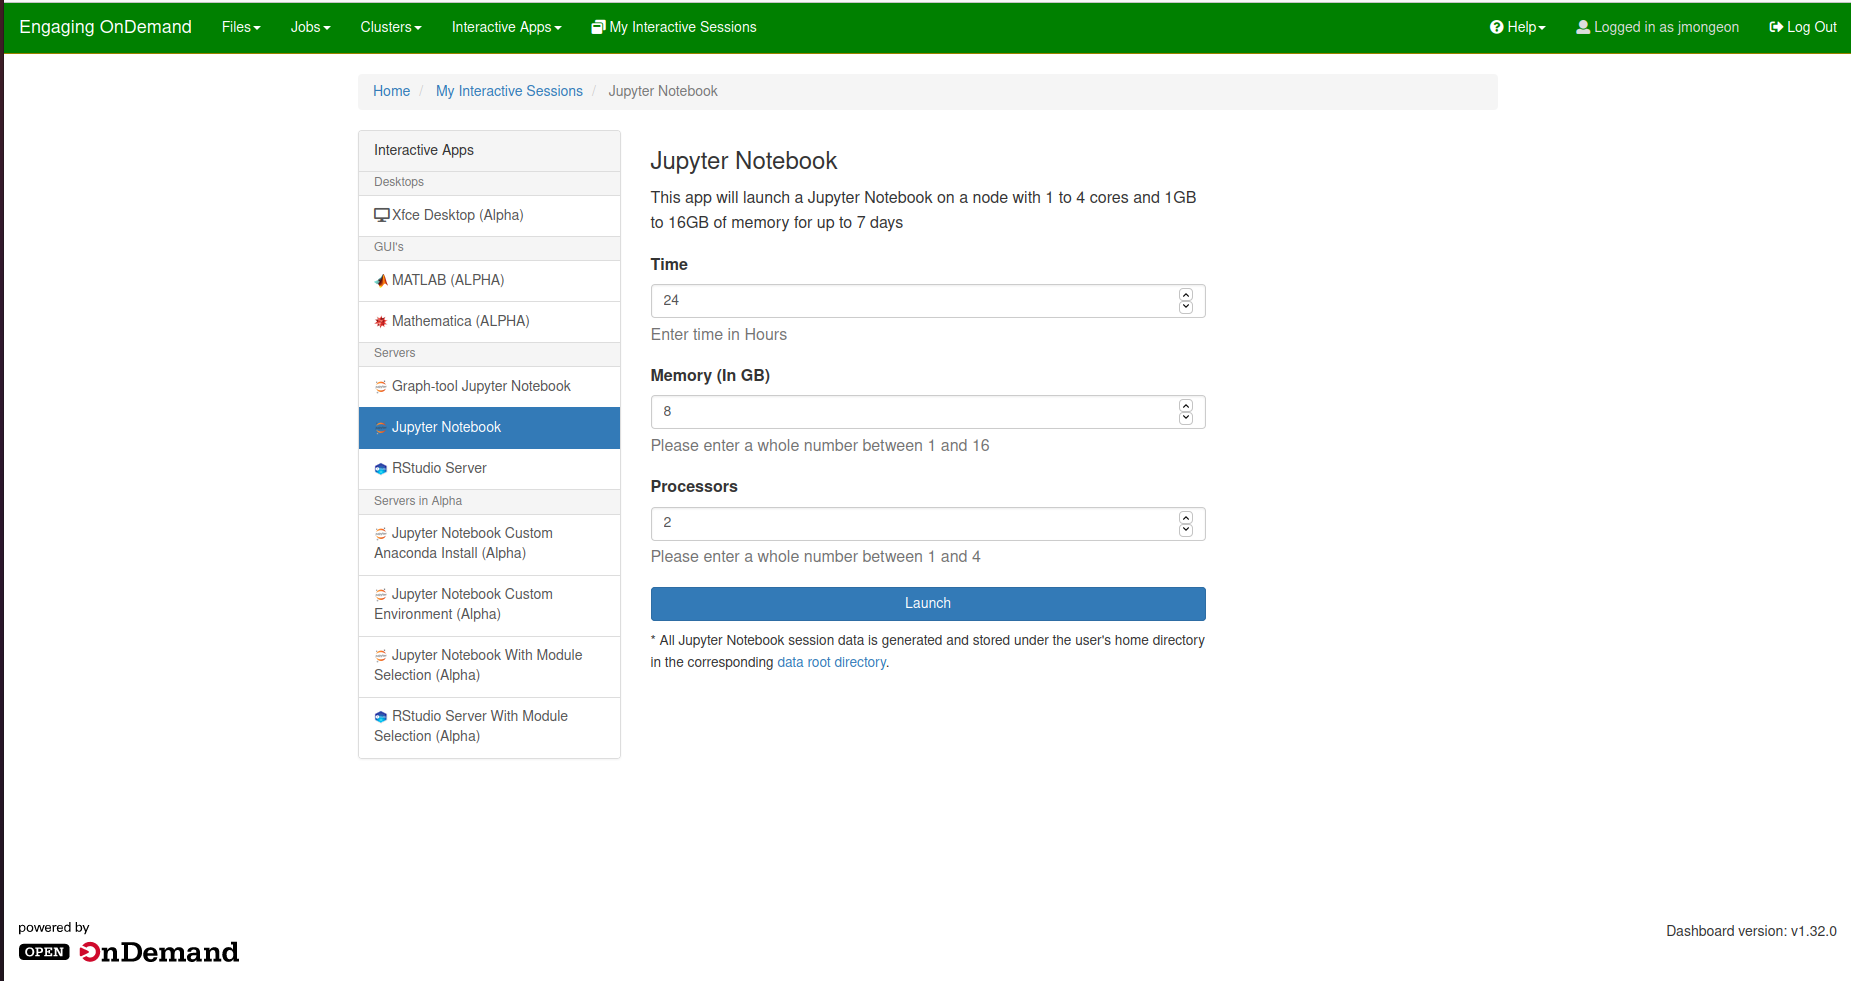
Once you select the basic Jupyter Notebook, you will see a screen that allows you to change the amount of resources allocated to your Jupyter Notebook. The maximum resources you can request are 16GB of Memory on 4 CPUs (processors) for up to 7 days. The default values are 8GB of memory on 2 CPUs for 24 hours.

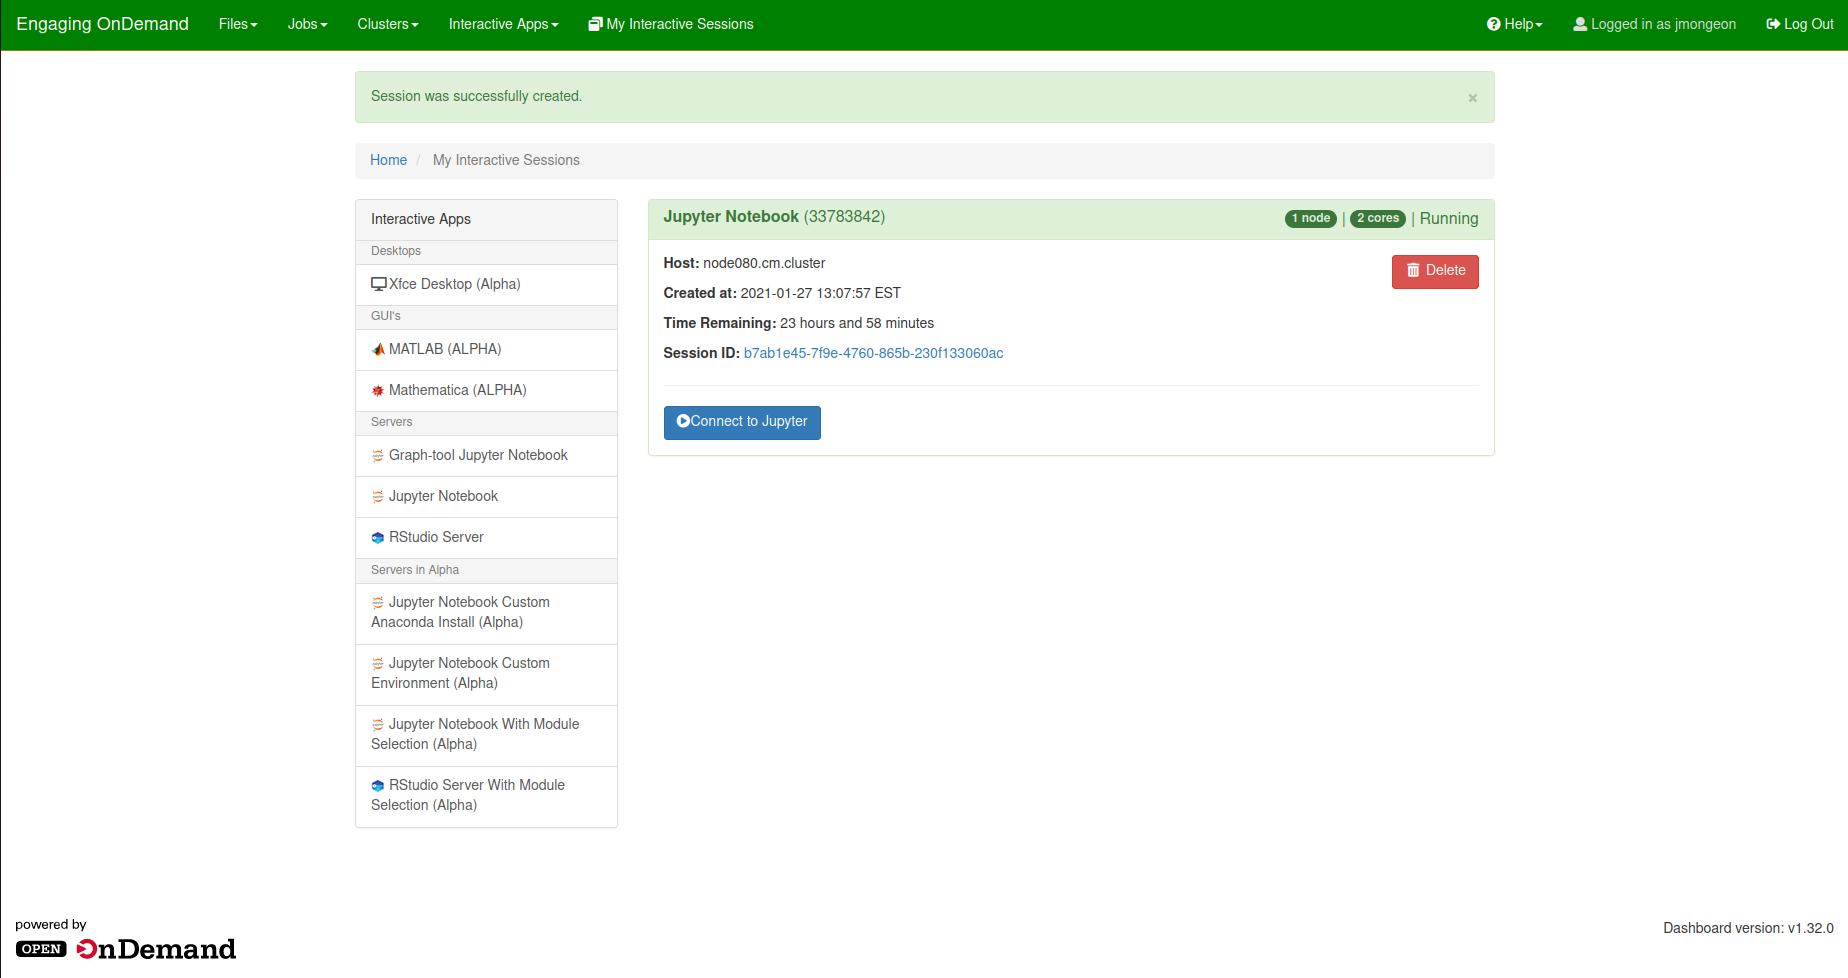
Once you fill out this information with your desired resources, you can click “launch” which will start your Jupyter Notebook instance. You will see a message that the instance is starting, and depending on the resources you requested it could take a few minutes to begin.

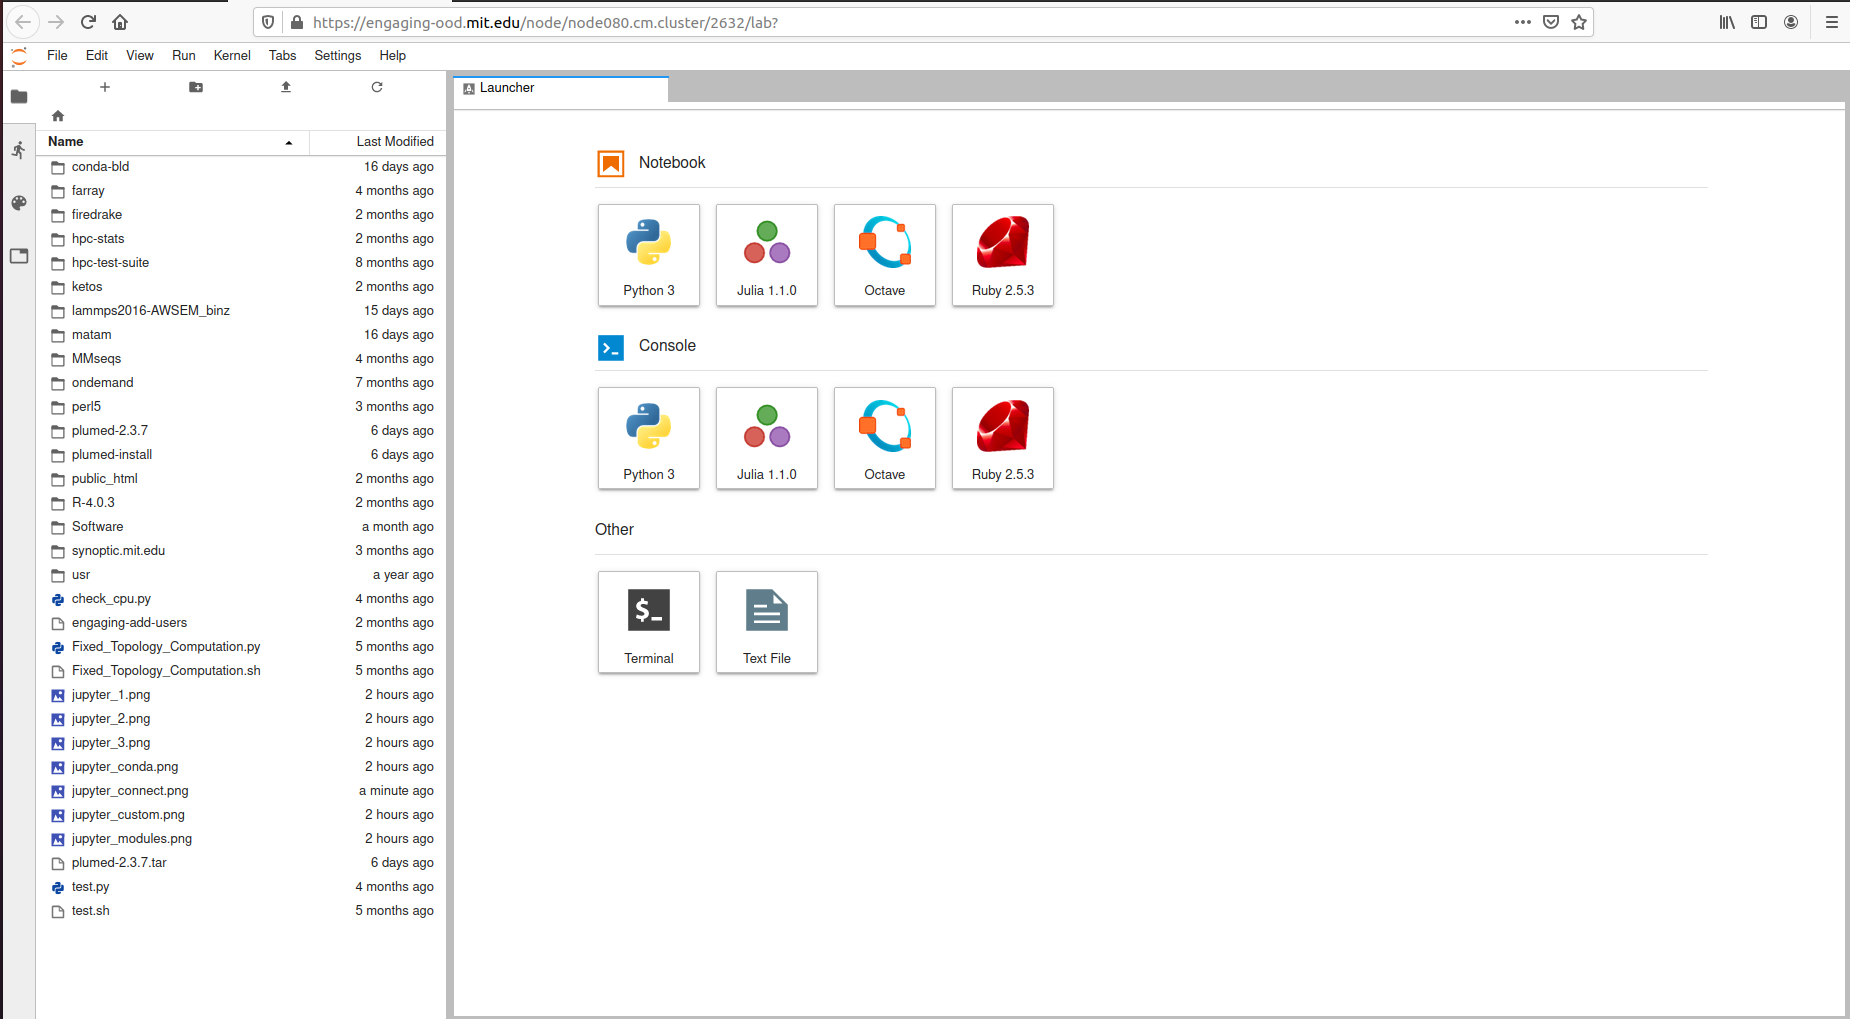
Once it begins, you will see a button that allows you to connect to the instance. Click this button to enter the interactive interface of your Jupyter Notebook.

If you have any questions or problems using jupyter notebooks, please email engaging-admin@techsquare.com