1. Jupyter Notebooks
Using a Jupyter Notebook
Jupyter Notebooks extend the console-based approach to interactive computing in a qualitatively new direction, providing a web-based application suitable for capturing the whole computation process: developing, documenting, and executing code, as well as communicating the results.
To use a Jupyter Notebook, first begin by logging into the Engaging OOD portal found here.
For instructions on how to log into the OOD portal, please see here.
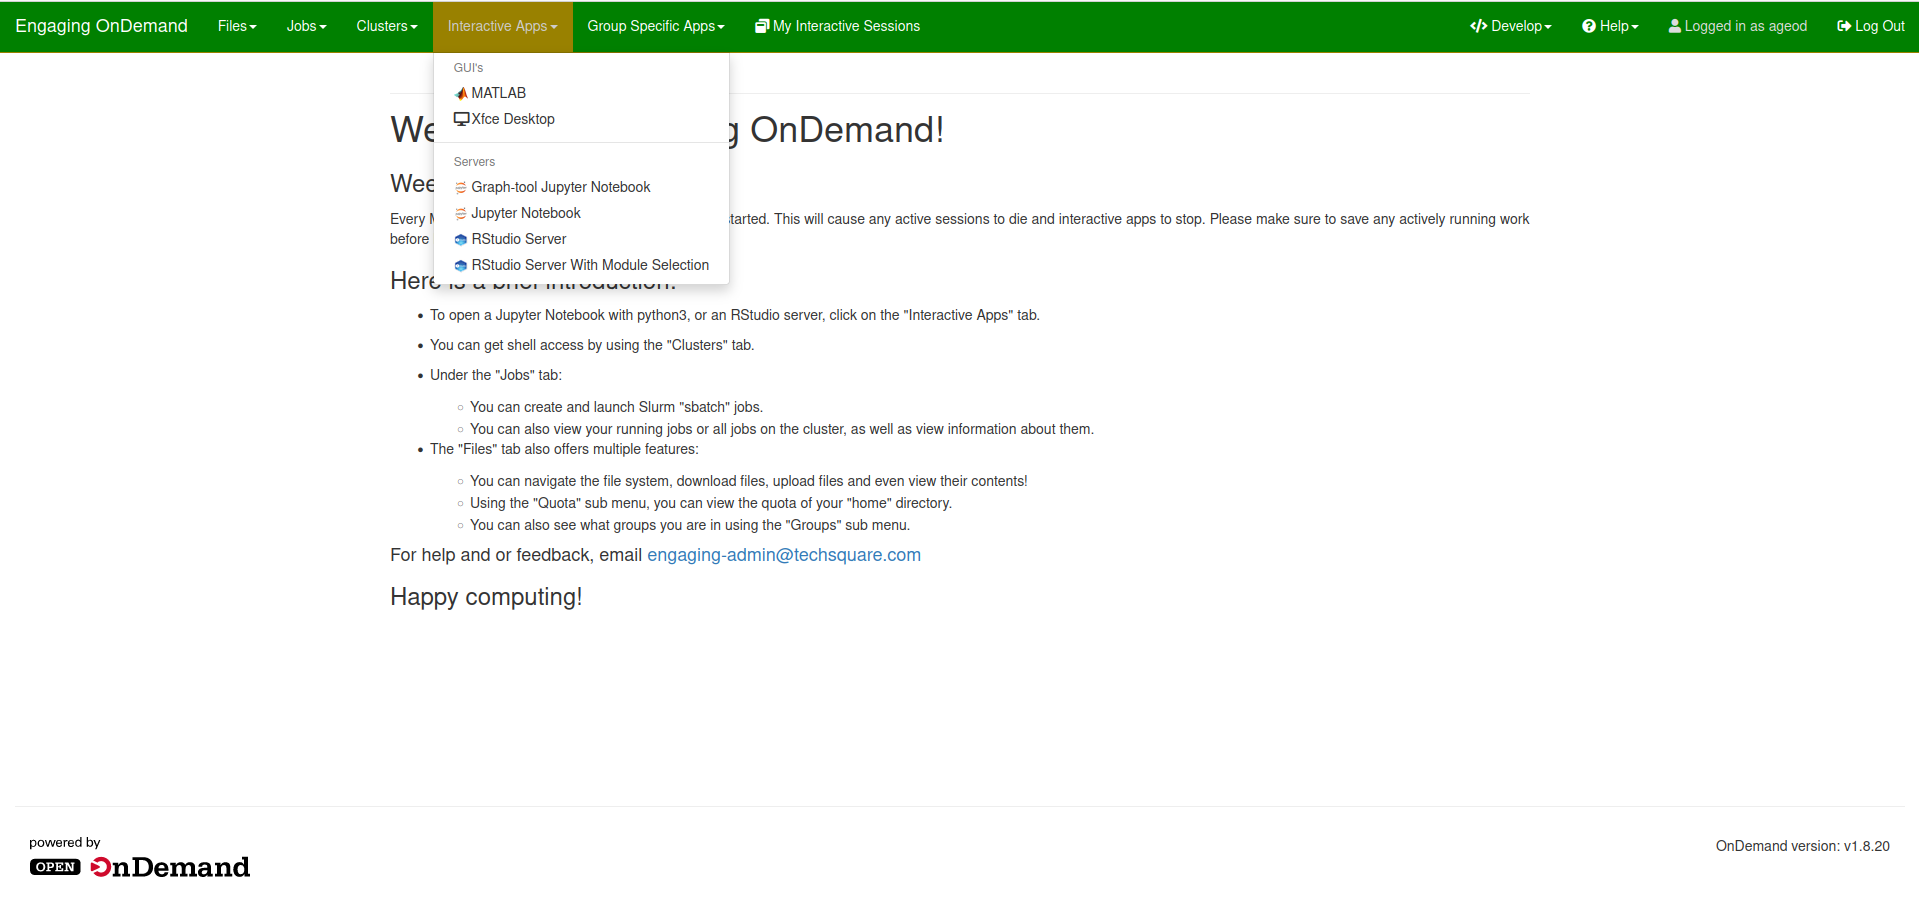
Once you have logged in, you will need to select “Interactive Apps” at the top of the screen, which will present a list of possible interactive applications available for use. Select “Jupyter Notebook” under the header “Servers” to begin customizing a new notebook.
After selecting Jupyter Notebook you will be brought to a page that allows you to change the amount of resources allocated to your Jupyter Notebook. The maximum resources you can request are 12 hours of runtime, and up to 62GB of memory. 2 compute cores are automatically allocated.
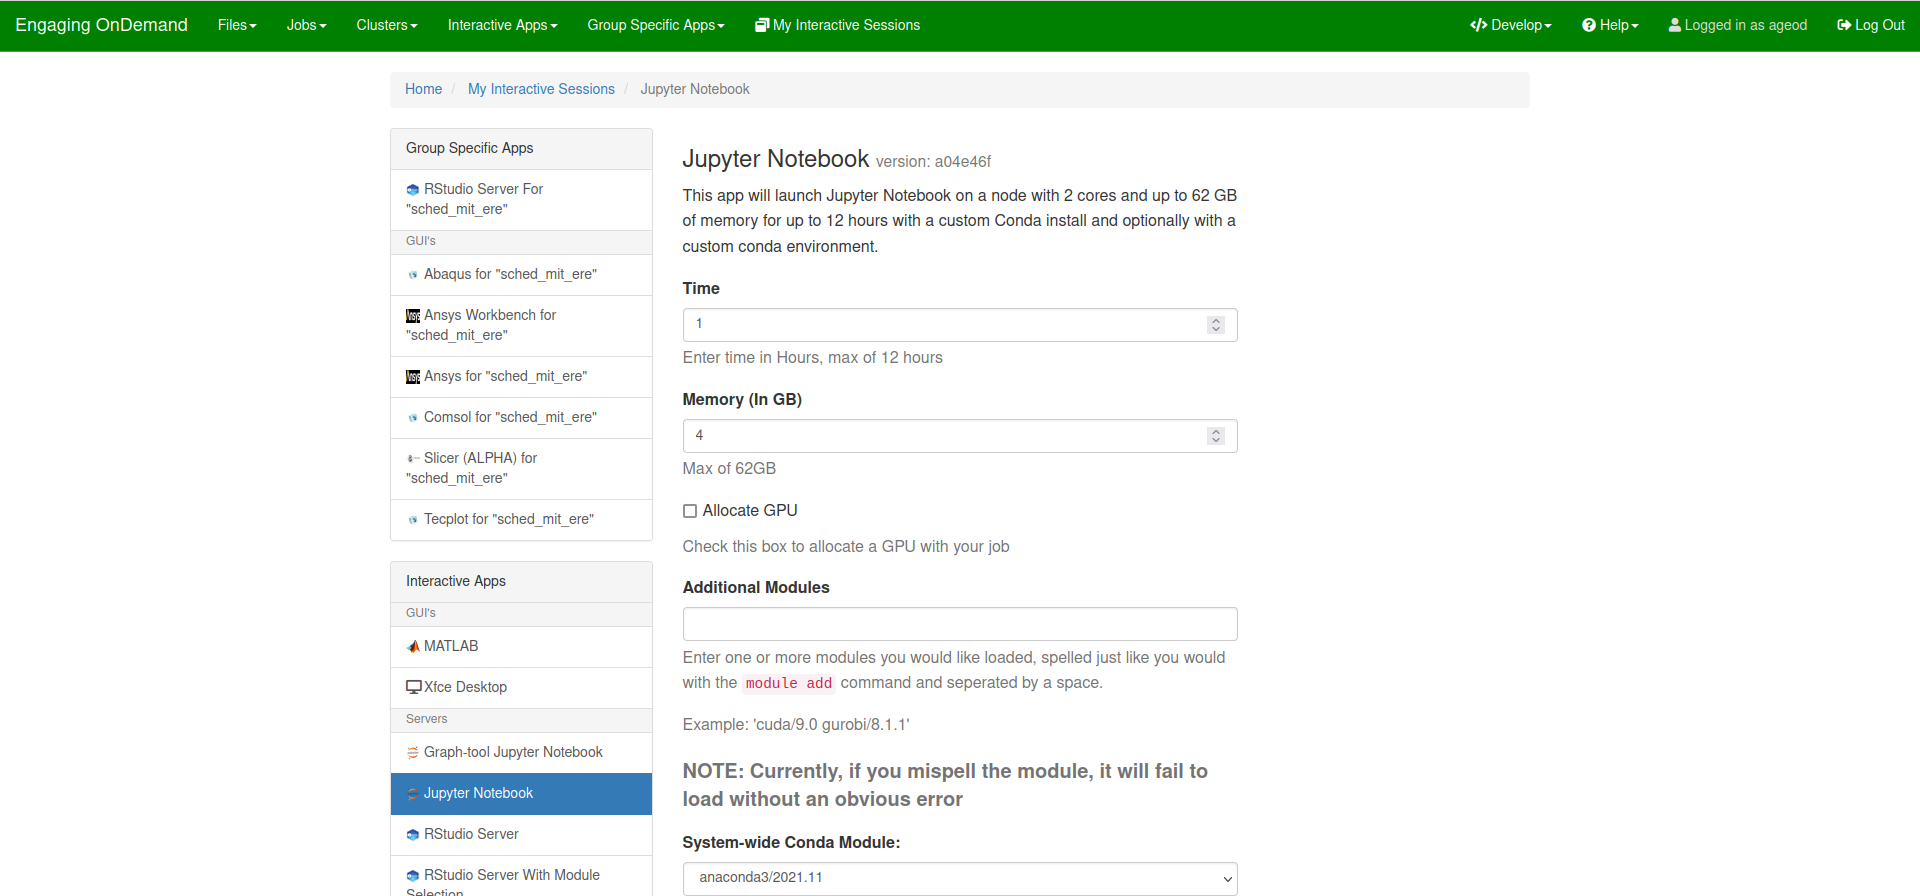
You will also see on this page the field to enter any additional modules that you would like to use with your notebook. These are the same system-wide environment modules found when using module avail from a terminal on the cluster. One or more modules can be entered, separate by spaces.
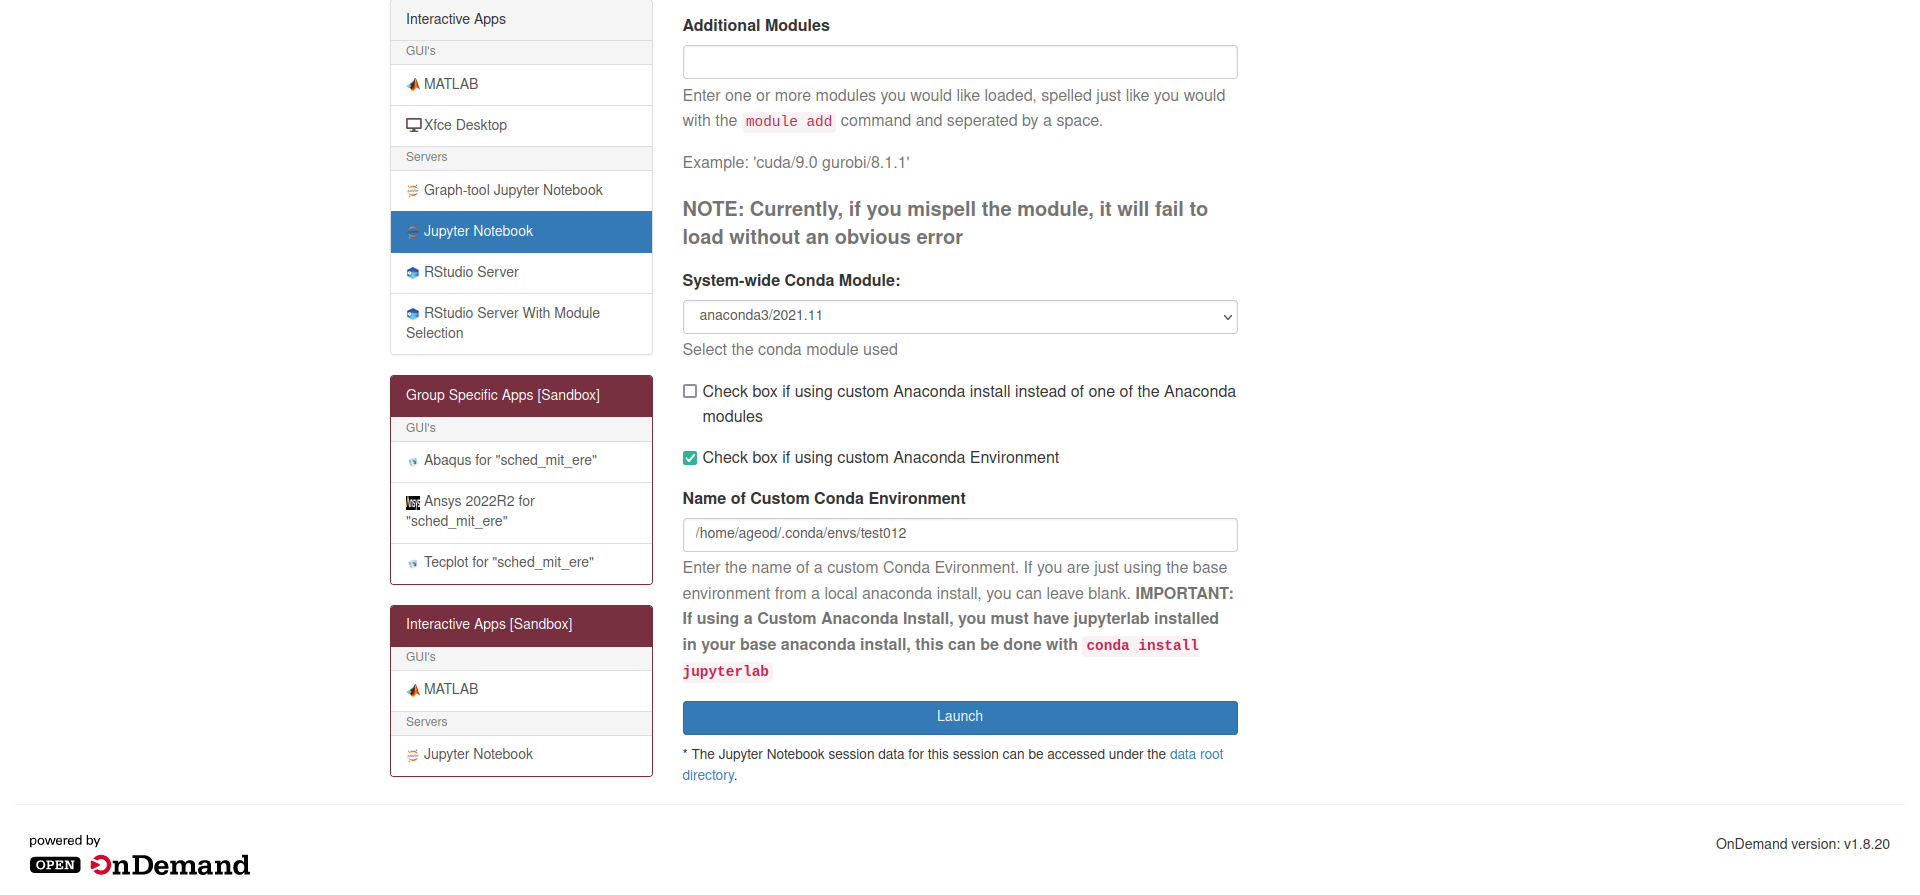
Further down the page, there is a drop down menu that will present the three most up-to-date system-wide anaconda modules available for use. If you elect to use your own anaconda install, you will need to check the box below the drop down menu and enter the full path to the location of your install. Note that you must have the “jupyterlab” package installed in your base anaconda install.
If you wish to load a pre-built, custom anaconda environment with the launching of your notebook you can check the next box down and enter the name of your anaconda environment if it is located in the base anaconda location, or the full path to the environment to be safe.
Once these options are set, you can click “Launch”.
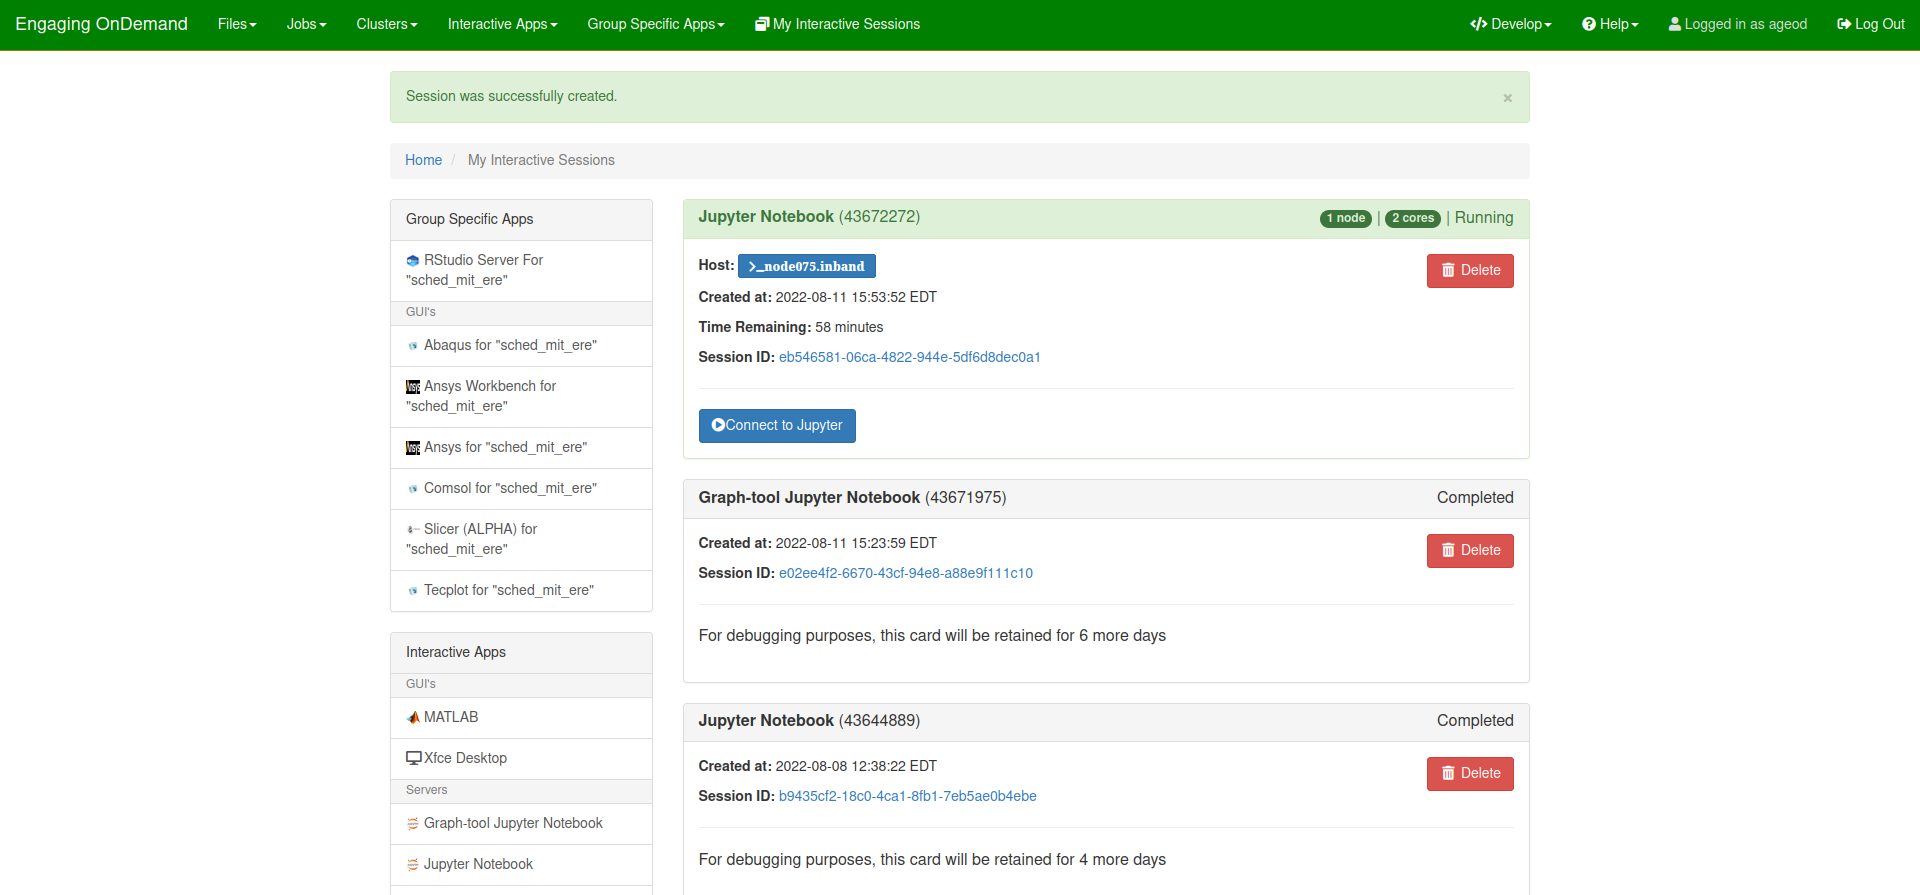
When your notebook first launches you will be dropped onto the “My Interactive Sessions” page. This page will show you any recent notebooks you have launched. You will see your most recent notebook at the top, and the one you just created will show as pending until the resources are allocated to you.
Please be advised that the time for your notebook to be ready is based on what resources you have requested and how busy the queue and OOD nodes are.
Once your notebook is ready it will be highlighted green, have the job ID in parenthesis at the top, and present a blue “Connect to Jupyter” button for you to click.
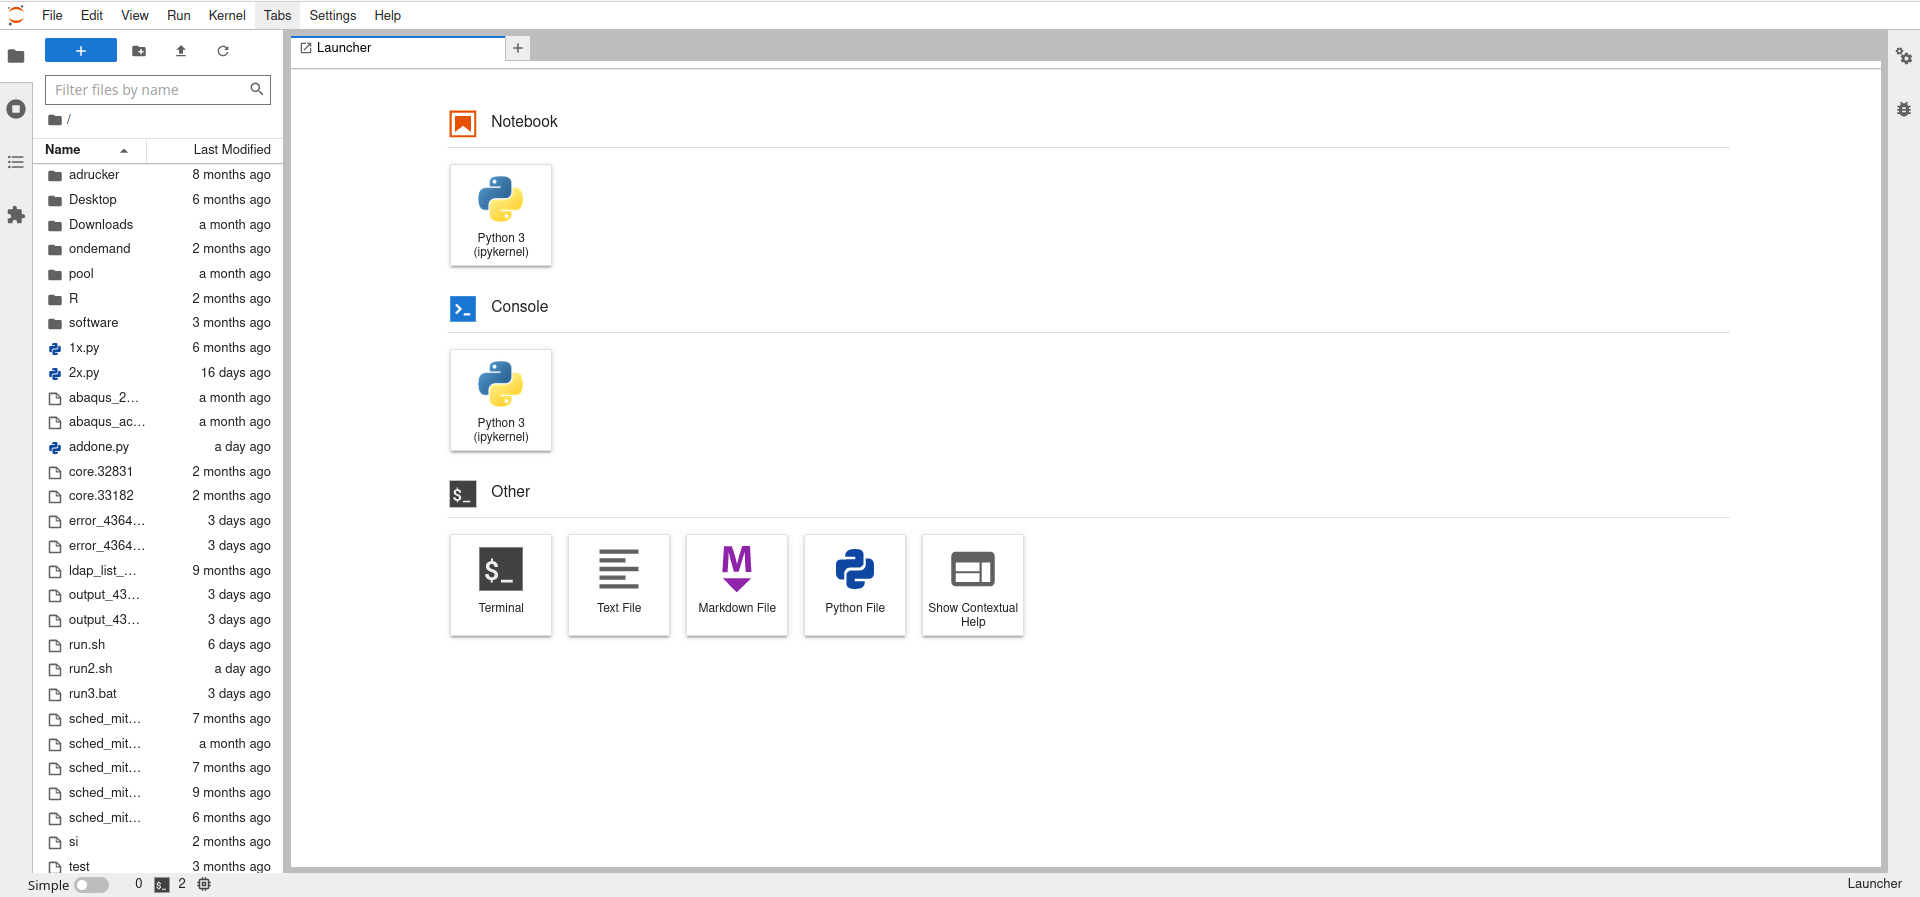
After the notebook has launched you will be in the Jupyter interface, which has a file explorer in the left-hand pane for your current working directory (likely your /home directory) and present to you a Launcher interface with a range of interactive apps to select from. You can see the “Python 3 (ipykernel)” option under the “Notebook” header signifying the standard python Jupyter notebook.
If you have any questions or problems using jupyter notebooks, please email orcd-help-engaging@mit.edu